Bicycle Lane Installation Guide

Components
- Cycle Lane Delineators available at TCSD
Fasteners (available at TCSD):
- Zinc plated steel bolts (3/8" diameter x 4" long)
- Plastic shields (9/16" diameter x 3" long)
- Zinc plated steel washers (supplied with the product)
What You Need
- Chalk line
- Measuring tape
- Heavy duty hammer drill and 9/16" (14 mm) carbide tip drill bit
- Ratchet or power tool to screw down the installation bolts
- Wrench with extension drive for bolt installation
- Hammer fo installation of the plastic shields
- Broom for cleaning installation surface
- Portable blower or vacuum cleaner for cleaning installation holes from dust and other debris
- Gloves, safety goggles
- Traffic cones, barricades or other means to secure the workplace
Crew
- 2 -4 installers

Step 1.
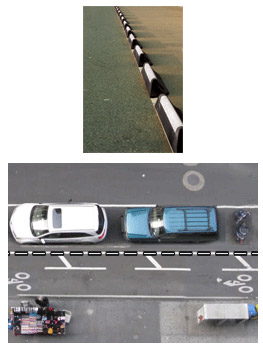
Determine where the Cycle Lane should be positioned and sweep the installation surface to ensure it is clean of debris / dust. Using the chalk line, mark the location for the bike lane delineator parallel to the curb.
Step 2.
Position the units following the chalk line. The units must be well aligned before moving on to Step 3.
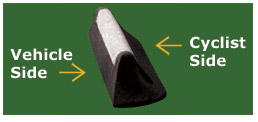
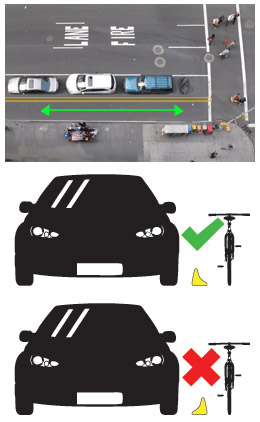
Note: Make sure the sloped side of the product is facing the bike lane and the steep side of the product is facing vehicle traffic.
Step 3.
Drill 9/16" (14 mm) diameter holes into the surface, through the existing holes of the product using a hammer drill and carbide drill bit. The holes should be 3.5"-4" (90-100 mm) deep in order to accommodate the plastic shields that are 3" long.
Step 4.
Remove the product and clean the just drilled holes to ensure they are free from dust and debris (a portable blower is used for this purpose).
Once the holes are clean, insert the plastic shields.
Step 5.
Re-position the product over the holes made in the installation surface.

Step 6.
Insert the bolts and steel washers into the product's installation holes and tighten. Do not over-tighten the bolts.
Maintenance
Periodically inspect the bolts and tighten if necessary.
